Are you looking for an easy way to convert addresses to coordinates without the hassle of dealing with APIs or coding? Well, I have some exciting news for you! In this blog post, I’ll guide you through the process of converting addresses to latitude and longitude using Google Sheets and the LocationIQ plugin. The best part? You don’t need any coding knowledge or API integration. It’s a straightforward, no-code solution that anyone can follow. So, let’s jump right in and discover how you can effortlessly perform these conversions using the familiar tool of Google Sheets. Let’s get started on this exciting journey!
Step 1: Create a Copy to get ‘Edit’ access
The first thing we need to do is ensure that you have the necessary permissions to edit the Google Sheet. Here’s what you need to do:
- Open the Google Sheet available here
- Go to the
Filemenu at the top left corner of the screen. - From the dropdown menu, select
Make a copy. Remember, downloading won’t work because we need the functions to operate properly. - A pop-up box will appear, informing you that the Apps Script file will be copied. This is essential for the sheet to function correctly.
- Congratulations! A copy of the template will now be created in your Google Drive.
- Now you can freely edit the sheet and input coordinates or addresses into your own copy.
Step 2: Activate the LocationIQ Plugin
Next, we need to activate the LocationIQ plugin within the Google Sheet. Follow these steps:
- Make sure you have ‘Edit’ access to the sheet, as mentioned in Step 1.
- Look for the
LocationIQtab at the top menu. It might take a few seconds to appear, but it should be there after the “Help” option. - Select
Settingsfrom the drop-down menu. - Google Sheets will ask for authorization through a pop-up. Click
Continueto proceed. - Sign in with your Google account and grant access. If you see a warning stating that “Google hasn’t verified this app,” click
Advancedand then “Go to LocationIQ (unsafe).” - Sign up for an account with LocationIQ at www.locationiq.com and obtain your Access Token. A quick guide on this is available here
- On the sheet, select
Settingsfrom the drop-down menu once again. - Input your access token beside the
API Key:box.
That’s it! The document is copied, the permissions are set — you’re all set to geocode and reverse geocode!
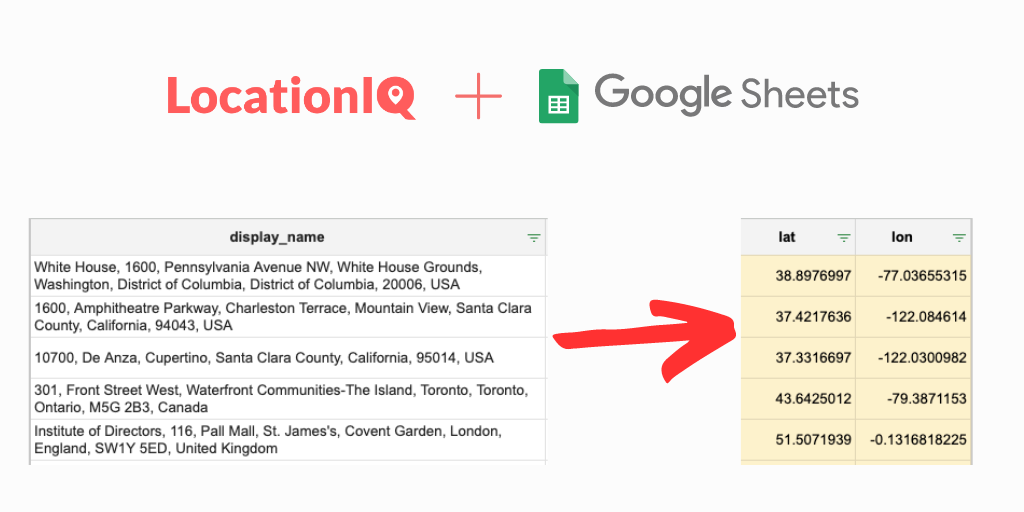
Forward Geocoding
Forward geocoding is the process of converting a human-readable address into geographic coordinates (latitude and longitude). It’s the opposite of reverse geocoding. Instead of starting with coordinates and finding the address, forward geocoding allows you to input an address and retrieve the corresponding latitude and longitude values.
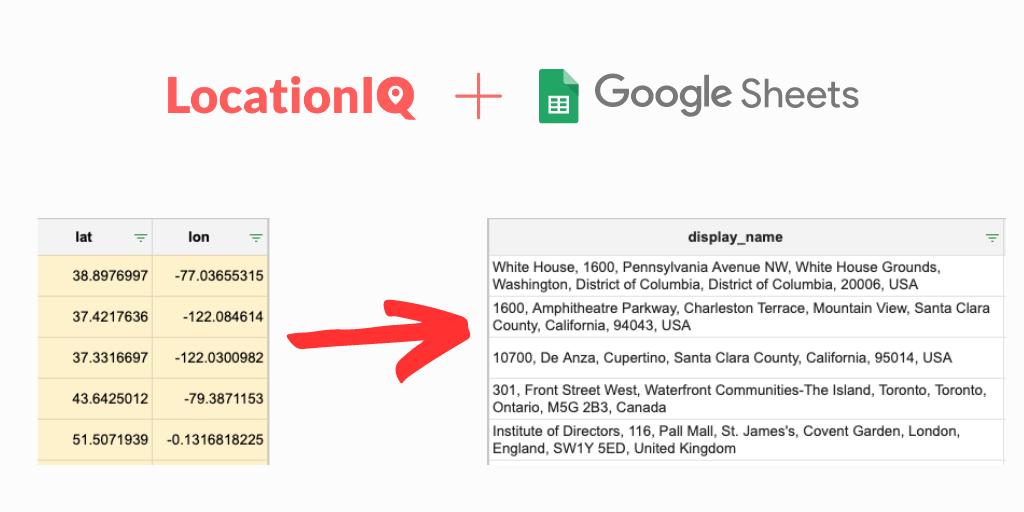
In our Google Sheet, we can also perform forward geocoding using the LocationIQ plugin. This means that you can input an address, such as a street name, city, and state, and the forward geocoding functionality will automatically convert it into geographic coordinates. Here are steps to convert addresses to coordinates within the Google Sheet:
- Switch to the sheet named
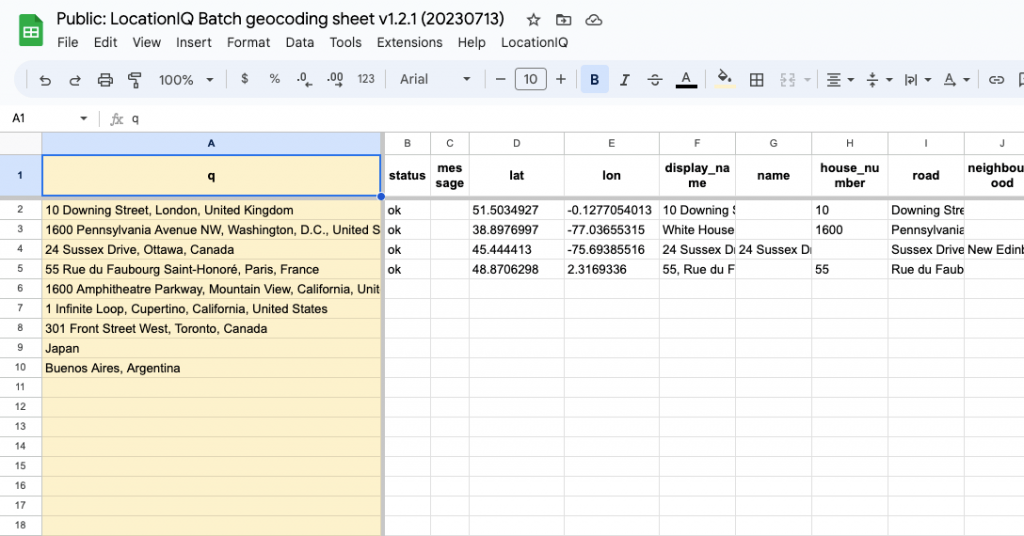
Forward Geocoding - Paste the entire address in Column A
- Recommend address format is (house_number), (street), (neighbourhood), (city), (state), (country), (postcode)
- Select the
LocationIQtab from the Drop-down and chooseGeocode
Well done on mastering the art of converting addresses to coordinates with the help of Google Sheets and the LocationIQ plugin. This incredible tool is a time and effort saver when dealing with location data. With just a few clicks, you can effortlessly convert addresses to coordinates and vice versa. I trust that this tutorial has proven valuable to you, and I encourage you to explore the additional features provided by LocationIQ to elevate your location-based projects. Enjoy mapping and happy exploring!